Most of the dances Alison teaches can be found in the Maypole Manual, a fantastic resource created by Mike Ruff and Jenny Read. However she also teaches variations of the above dances, and some new ones!
Diamond Tree
Created in May 2023 by Alison Rowley with help from students of Callowell Primary School in Stroud
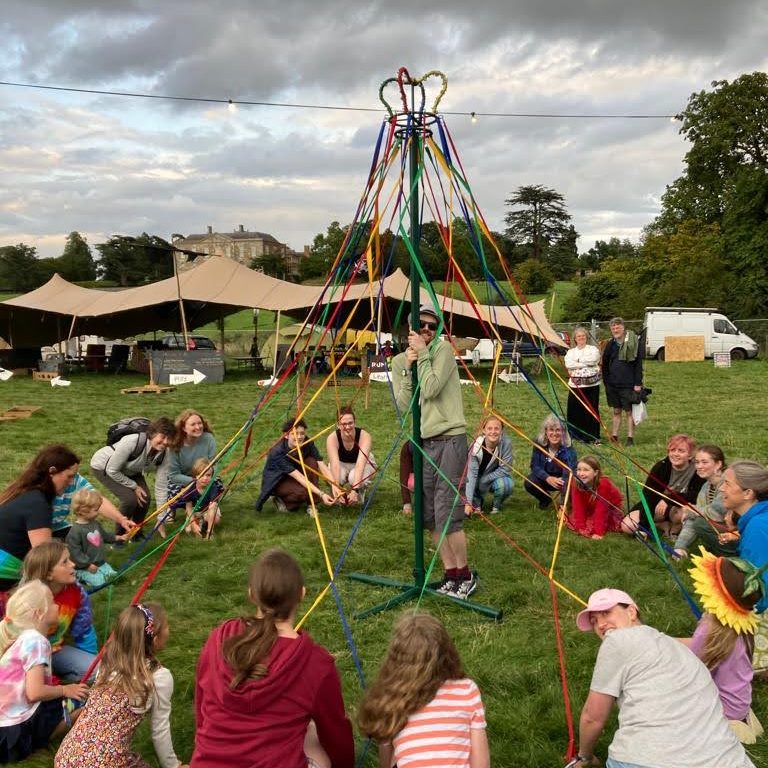 Formation: Stand in a circle, with an even number of ribbons. Ideally, the colours of ribbons would be arranged in a repeating pattern, e.g. Red Yellow Blue Green, Red Yellow Blue Green, etc.
Difficulty: one of the trickier ones, purely because there are lots of people moving at once (which is hard to keep an eye on) and the timing of their moves is important (you can’t have one person rush ahead). It’s a quick one though, requiring one burst of concentration from each group of dancers, rather than lots of turn-taking.
What’s the goal? To create a ‘cage’ or ‘tree’ from a pattern of diamonds all around the maypole. Similar to the Spider’s Web dance but with twice as many ribbons moving at once. I get half the dancers/ribbons to create the pattern, and the other half to untie it again. This dance happens very quickly once the dancers have learnt the moves, so I often dance it twice in a row (pretty unheard of in other maypole dances!).
Step 1. Split the group into two equal size teams of dancers holding alternate ribbons, e.g. Reds & Blues, and Yellows & Greens (if using my order of ribbons above), or just Odd and Even numbers.
Step 2. Decide which team is going to move first, to create the pattern. I’ll call these dancers the Tree Growers (although I’d normally just say their ribbon colours). Everyone else, stand still.
Step 3: The Tree Growers need to identify who is their First Partner (the person on their right) and who is their Second Partner (the person on their left). Check that everyone knows this before you start!
Step 4: The dance begins! The Tree Growers dance once around their First Partner, by first lifting their ribbon over their First Partner’s head and walking around behind them, then ducking underneath their First Partner’s ribbon to return to their original place in the circle. Everyone should be back where they started, but there should now be a twist between the two ribbons. Don’t move on until every Tree Grower has finished this move!
Step 5: The Tree Growers repeat Step 4 around their Second Partner, once again lifting their ribbon over their Second Partner’s head first, then returning by ducking underneath their Second Partner’s ribbon. Don’t move on until every Tree Grower has finished this move!
Note: Step 4 will be an anticlockwise circle, while Step 5 is a clockwise circle. The two moves together mean that the Tree Grower is moving in a figure of 8 pattern – however, it’s important that they don’t rush into Step 5 until their whole team is ready to proceed. Also, you might need all dancers to take a small step closer to the maypole as you go along, because the Tree Growers will start to run out of ribbon.
Step 6: Repeat Steps 4 and 5 approximately twice more. You’ll notice this is sufficient to form an amazing pattern very quickly! Take a moment to enjoy the result before you unwind.
To Unwind:
Step 7: Tree Growers keep still now! The dancers who haven’t yet moved are the Tree Destroyers. They need to identify their First Partner (on their right) and their Second Partner (on their left).
Step 8: Same as Step 4! But this move nows removes the ribbon twist, instead of creating one.
Step 9: Same as Step 5! Again, a twist is removed.
Step 10: Repeat Steps 8 and 9 as many times as you need to until the pattern has disappeared.
You could then try the dance again and admire how quickly the pattern appears and disappears, or even swap the groups over so the original Tree Destroyers now get to be the Tree Growers.
Can I do this dance without a repeating pattern of coloured ribbons? Yes! As long as there is an even number of ribbons, you can also use other role names like 1 and 2, or odd and even, or apples and bananas. Just make sure everyone knows which role they are taking before the dance starts, and adjust your instructions accordingly.
What if I get a tangle? As with all maypole dances, look at the twist closest to the bottom end of the ribbon. Think: which ribbon is on top? To untangle it, that top ribbon must move over the other one – just like the beginning of Steps 4 and 5. The good news is that untangling this dance shouldn’t take long, because (theoretically!) no one has moved very far around the circle.
The Leominster Lattice
Created in May 2025 at Ivington Church of England Primary School in Leominster.
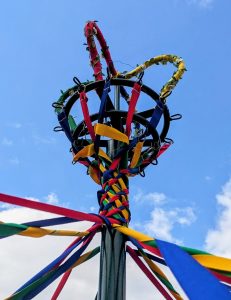
Formation: Stand in a circle, with an even number of ribbons, and also an even number of colours arranged in a repeating pattern around the circle. In this description the ribbons are arranged in a repeating pattern of Red Yellow Blue Green moving anticlockwise round the maypole. And I prefer to start with a ribbon from the lower ring on my maypole (so either Yellow or Green).
Difficulty: another of the trickier ones. Only one colour moves at a time but you need to check they all make it to their new position – they might do this by counting people or remembering which colours they stand next to. You also need to keep careful track of which colour you’ve got to in the pattern, and which direction they should move – it’s not obvious just by looking at the ribbons! And it’s then very tricky to spot what has gone wrong so tangles are hard to undo. I would only attempt this dance with an attentive group.
What’s the goal? A beautiful lattice of twisted ribbons around the maypole. It takes a few moves before you can see it take shape so be patient!
Step 1. Greens dance to the Left around the outside of the circle, into the next Green spot. i.e. take their ribbon over the head of one Blue, one Yellow, and one Red, then stop between the Red and the next Blue.
Step 2. Reds (i.e. the last people the Greens just danced past) dance to the Right around the outside of the circle, into the next Red spot.
Step 3. Yellows dance to the Left.
Step 4. Blues dance to the Right.
Step 5. Repeat Steps 1-4 several more times until you can see more of the beautiful pattern! Remember, when you stop you’re only halfway through the dance, so don’t get too carried away.
To unwind: repeat everything exactly in reverse. i.e. start with the Blues but send them to Left this time. Then Yellows to the Right, Reds to the Left, and Greens to the Right.
Criss Cross Jump
Not an original one of mine, but I recreated it from a photo I saw on google, which you can view here (opens external website). I’ve not seen it written anywhere else so this is how I teach it. The name was chosen by the class of primary school children that I tried it out on first!
Formation: Stand in a circle, with an even number of ribbons and an even number of colours. In this description the ribbons are arranged in a repeating pattern of Red Yellow Blue Green moving anticlockwise round the maypole. And I prefer to start with all the ribbons from the lower ring on my maypole (Yellows and Greens).
Difficulty: It’s similar to Leominster Lattice, but this time half the dancers move at a time, so there are only two groups and it’s a lot easier to keep track of things. You’ll still need a fairly attentive class though, and to make sure everyone moves to the correct position before you call the next move.
Step 1. All the Yellows and Greens dance to the Left round the outside of the circle for a short distance*. The exact distance is flexible depending on how many ribbons you have and how diagonal you want the cross to look but I suggest that they go over the heads of four people (e.g. the Yellows go over Red 1 Blue 1 Red 2 Blue 2). It’s helpful to count this out loud, slowly, and let the dancers ‘jump’ their ribbon over each person in turn.
Step 2. All the Reds and Blues dance to the Right around the outside of the circle, over the heads of four people.
Step 3. Repeat Steps 1 and 2 several times until you can see lots of criss crosses!
To unwind: repeat everything exactly in reverse. i.e. start with the Reds and Blues but send them to Left this time.
*I think the optimum distance to travel is between a sixth to a third of the way round the circle (i.e. in a circle of 24 ribbons with 6 of each colour, the Yellow ribbon moves either 1 or 2 Yellow spaces round the circle). If you let the dancers move too far, the criss cross pattern gets messy.
Note: I’ve tried a version of this dance where each colour dances all the way around the circle, and the result is a messy pattern, although it improves slightly after a few goes. It’s good for very little children though as it makes it a much easier dance (and they probably won’t expect much from the pattern). You can also try it just 1 colour at a time, like in the Leominster Lattice. It’s all suddenly a much easier dance as it’s easier for you to see what’s going on, and young children will find it easier to understand what to do – i.e. ‘just dance round the circle once until you’re back where you started’.